How to Use Pro Convert Decoders’ Hotkey Function to Quickly Switch NDI Video Sources
Many models of our Pro Convert decoders (as of this writing, all current models except the Pro Convert for NDI® to AIO) feature a USB type-A interface that allows users to connect a keyboard or mouse, enabling them to directly configure decoding parameters without logging into the devices' web interface. Beginning with firmware version 1.1.595 (available as an upgrade for existing decoders), users can also define keyboard "hotkeys" to quickly switch between source streams, enabling more flexible presentation and display without the need for a separate switcher.
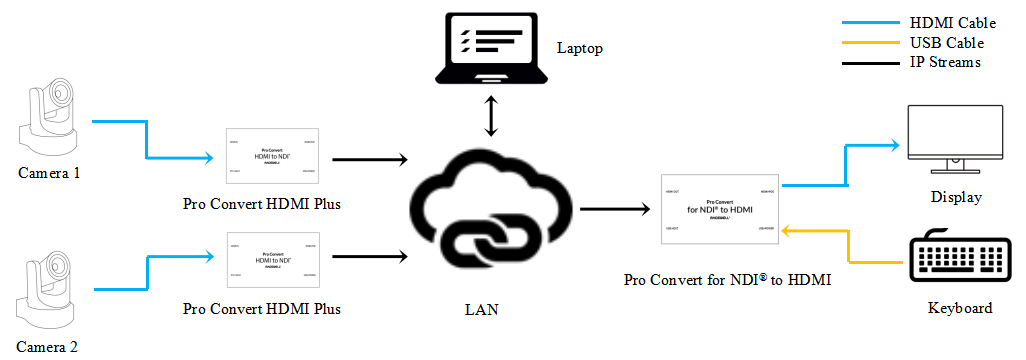
While NDI streams from any compatible production software or equipment can be used as input sources to the Pro Convert decoder, in this example we will use two Magewell Pro Convert encoders connected to cameras.
Devices Used:
- Two Magewell Pro Convert encoders (Pro Convert HDMI Plus encoders are used in this example).
- One Magewell Pro Convert decoder (Pro Convert for NDI® to HDMI is used in this example).
- Two PTZ cameras.
- One laptop, one display, one keyboard and several HDMI cables.
Steps:
1. The content flow of our example workflow is outlined in the device connection diagram below. This tutorial assumes that your Pro Convert encoders are already configured with your preferred encoding and transmission parameters and are actively sending NDI streams. By default, the name of the NDI stream sent by each encoder includes that specific encoder's serial number.
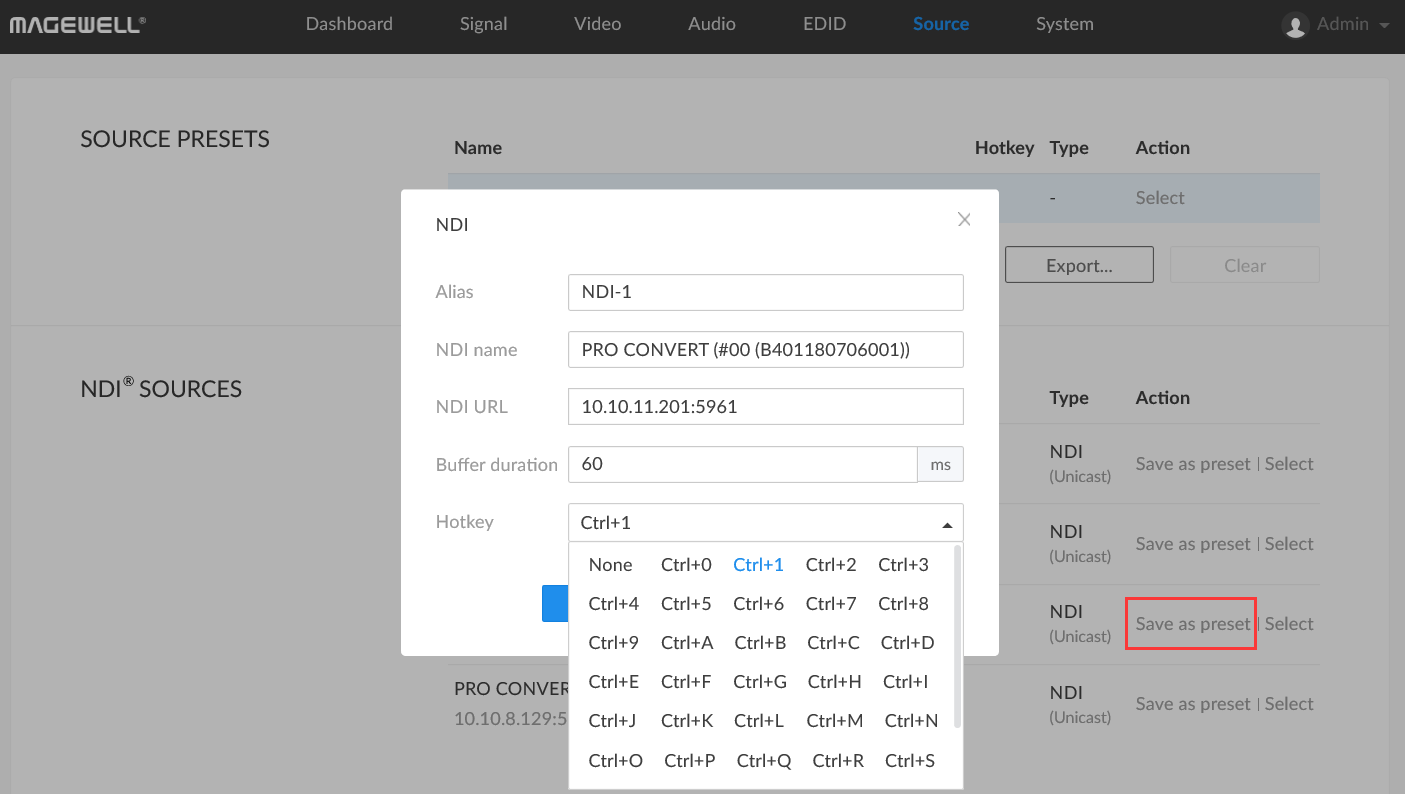
2. Log into the Web GUI of the decoder through a browser on your laptop, and go to the Source tab. Choose one of the NDI source streams available on your network, and click "Save as Preset" next to it. In the configuration pop-up, you can assign an Alias (short-form name), edit the NDI Name, and change the buffer duration. (Please see this article for an explanation about setting the buffer duration for your particular network environment). In the Hotkey field, select the keyboard shortcut that you want to use for this source (in this screen shot, CTRL-1) in the drop-down list. Click “OK”.
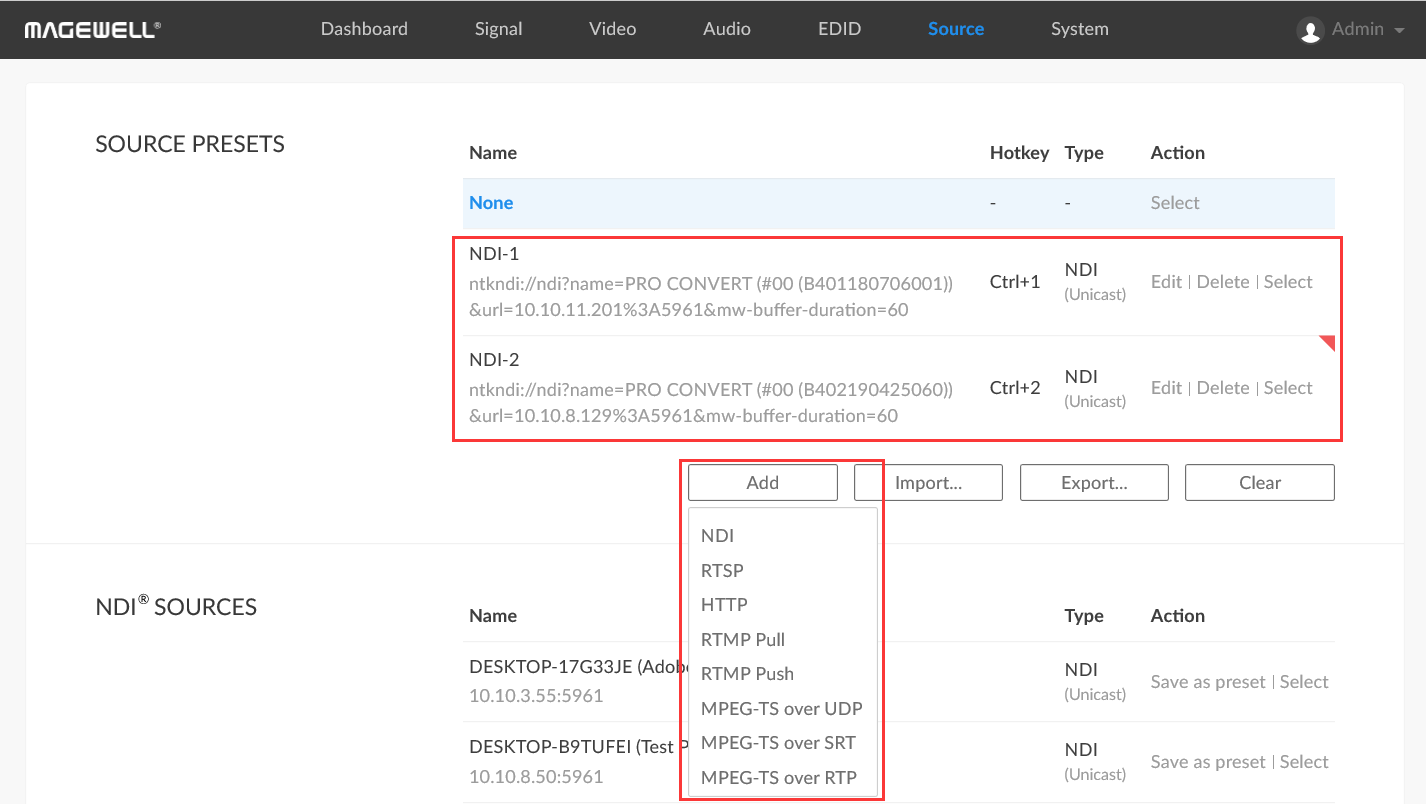
3. Repeat the above steps to configure a hotkey for each additional NDI source stream that you wish to switch between. In this screenshot, we are assigning the second source stream to CTRL-2.

4. Back in the Source tab of the Web GUI, you can now see the two NDI streams with hotkeys set in the "SOURCE PRESETS" section. In addition, you can also click "Add" in the "SOURCE PRESETS" section to manually add NDI, RTSP, HTTP, RTMP Pull/Push, or MPEG-TS over UDP/SRT/RTP streams and then assign hotkeys to them.
5. Now that the hotkeys are configured, you can switch between sources using a keyboard connected to the decoder. In our example, pressing the hotkey CTRL-1 will result in the device decoding and outputting the signal from Camera 1; pressing CTRL-2 will switch it to decoding and outputting the signal from Camera 2.
In practical applications, users can also choose a programmable keypad that is smaller than the conventional keyboard -- such as the X-Keys numeric keyboard – to save desktop space.