Recording Live Video to Files on Network Attached Storage with Magewell Ultra Encode AIO
Network-attached storage (NAS) is a type of dedicated, shared file storage that allows multiple users and a diverse range of client devices to centrally store and retrieve data. Users on a local area network can access the shared storage via a standard Ethernet connection. This blog explains how to record live video to files on a NAS device with Magewell's Ultra Encode AIO advanced live media encoder.
Steps:
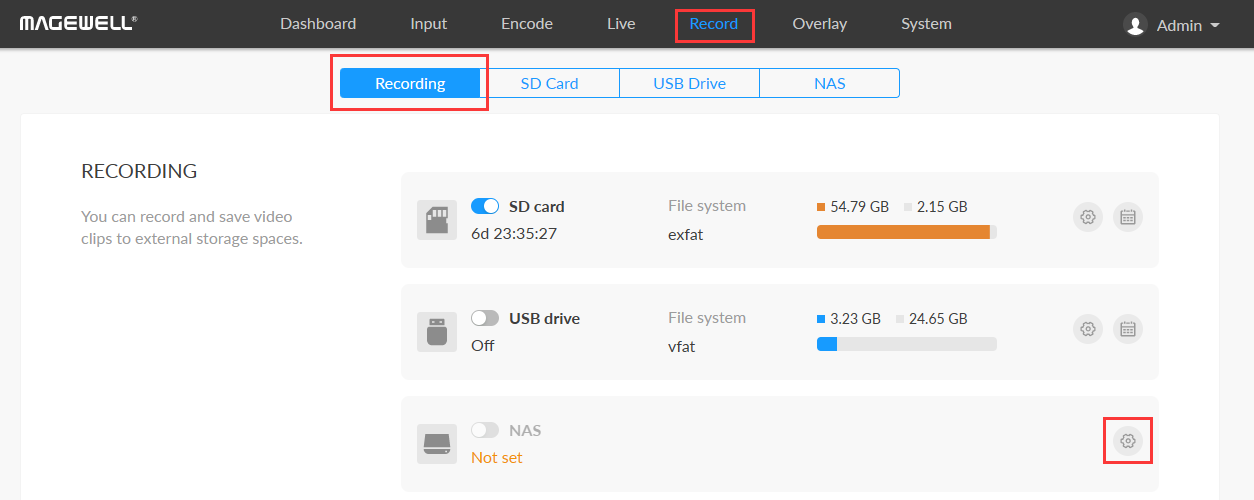
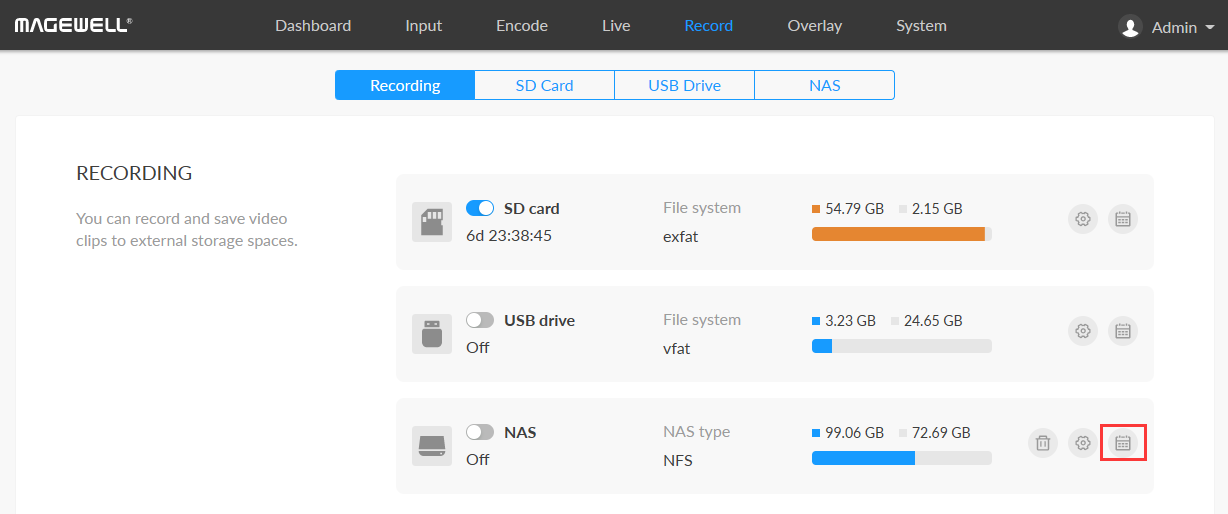
1. Log into the web GUI of the Ultra Encode AIO unit. Select “Record” in the top meu, and the “Recording” tab. In the Recording panel, click the gear icon on the right side of the “NAS” row to enter its configuration page.
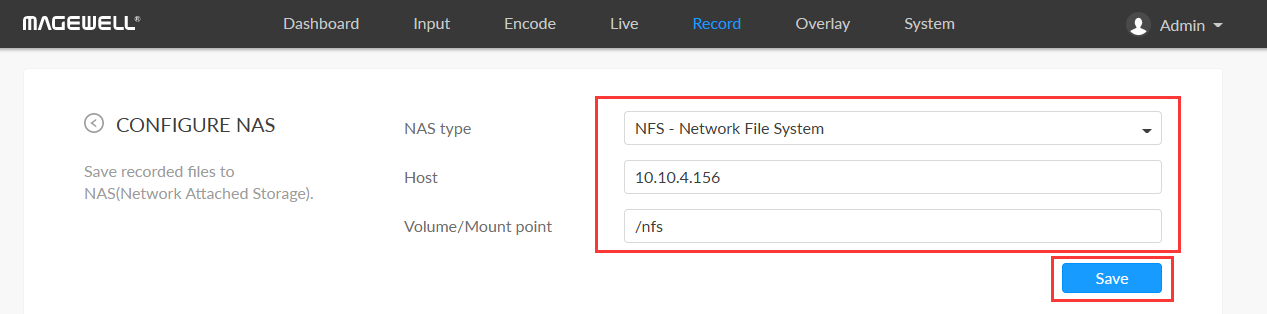
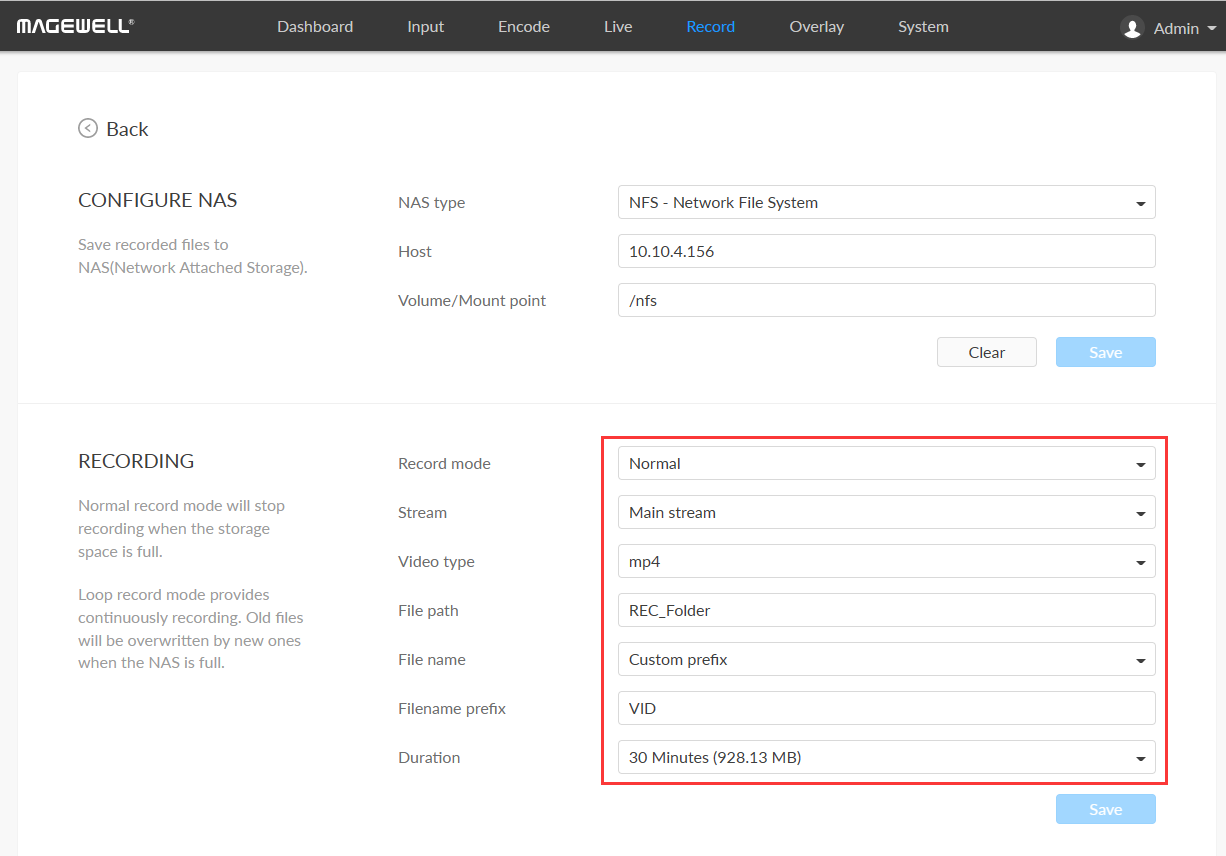
2. On the pop-up panel, configure the following recording parameters:
- NAS Type: options are “NFS - Network File System” (default) and “CIFS - Common Internet File System”. We will use NFS in this example.
- Host: enter the IP address of the NAS device ("10.10.4.156" in this example)
- Volume/Mount point: specify the name of the destination storage disk (from 1 to 64 characters). This is shown as "/nfs" in our example below.
Click "Save" after entering these settings.
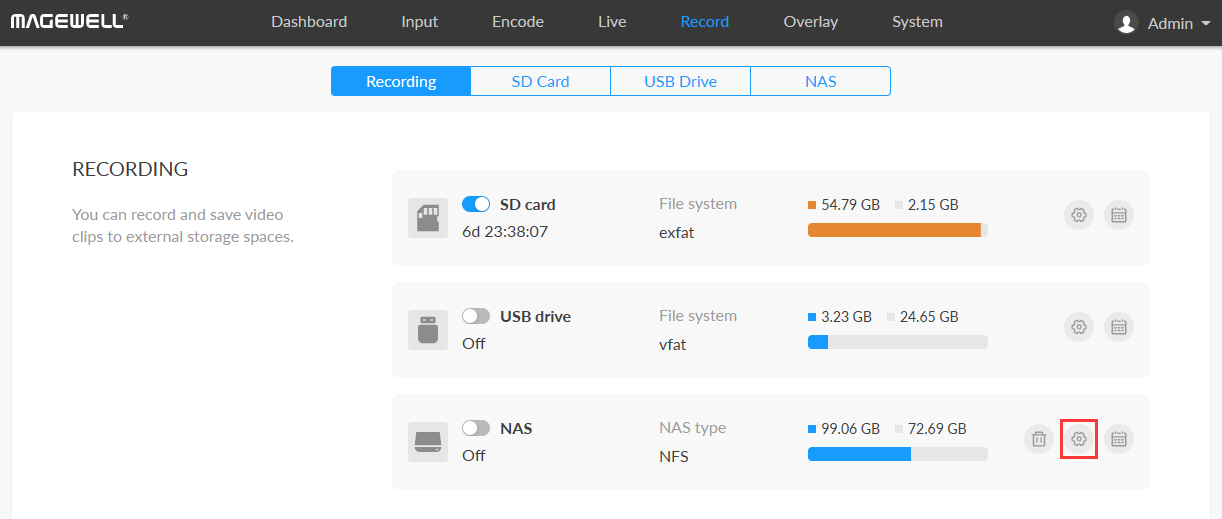
3. With the NAS now successfully added, click the middle icon to set the recording parameters, including Recording Mode, Stream (main stream or sub-stream), and Video Type. Click Save when you have finished entering the settings.
4. In the NAS row, you can optionally click the right icon to set a recording schedule if desired. For details, please refer to the blog Scheduling Live Streaming & Recording with Magewell Ultra Encode AIO.
5. Turn on the NAS switch to enable the recording of files to the NAS.
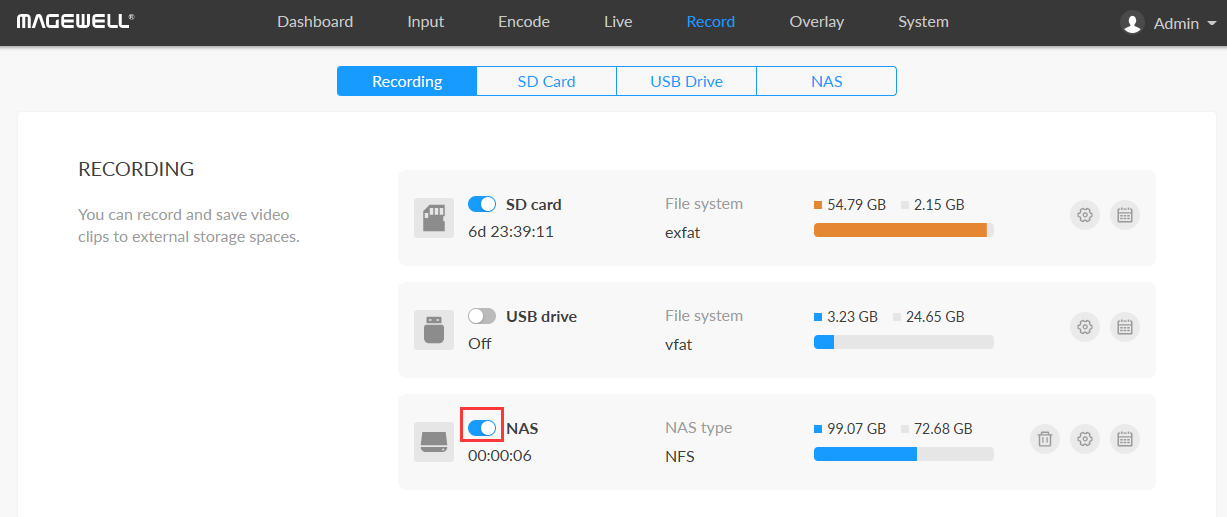
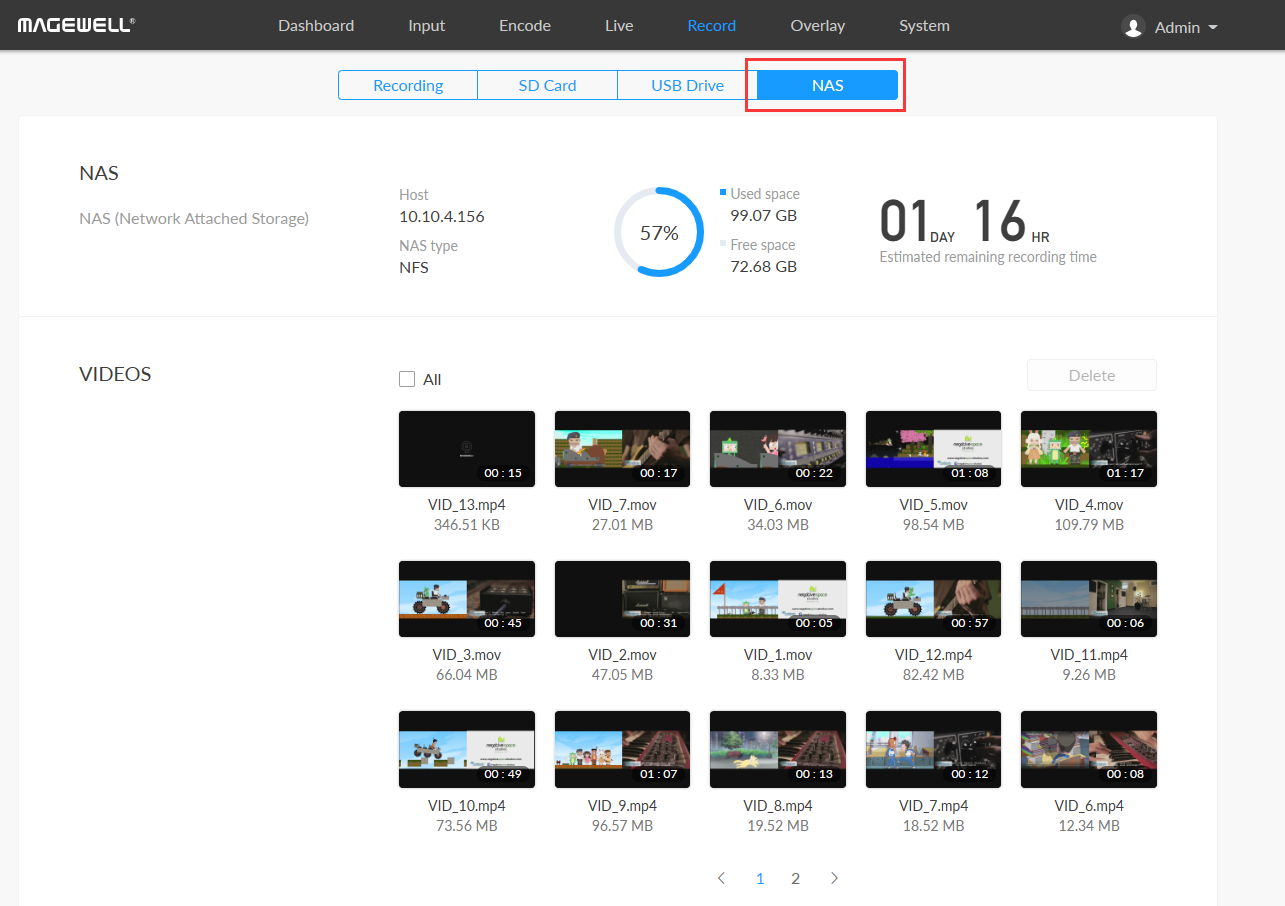
6. Click the "NAS" tab to view the current NAS storage status, including used space, free space and estimated remaining recording time. You can also delete and download stored video files.