Managing Audio for Dual-PC Streaming
From individual players to formal eSports competitions, the live streaming of video games continues to increase in popularity as a form of entertainment. For gamers looking to augment their streams with additional graphics, effects, and audience interaction, software-based streaming can provide advantages over hardware encoders. When the source device is a gaming computer rather than dedicated game console, a dual-PC setup can ensure the high-quality stream production and allow sufficient CPU resources for audience interaction while maintaining a smooth gameplay experience and video playing.
This blog post will provide an example of how to use a Magewell capture device in a dual-PC streaming configuration, with tips on configuring audio options.
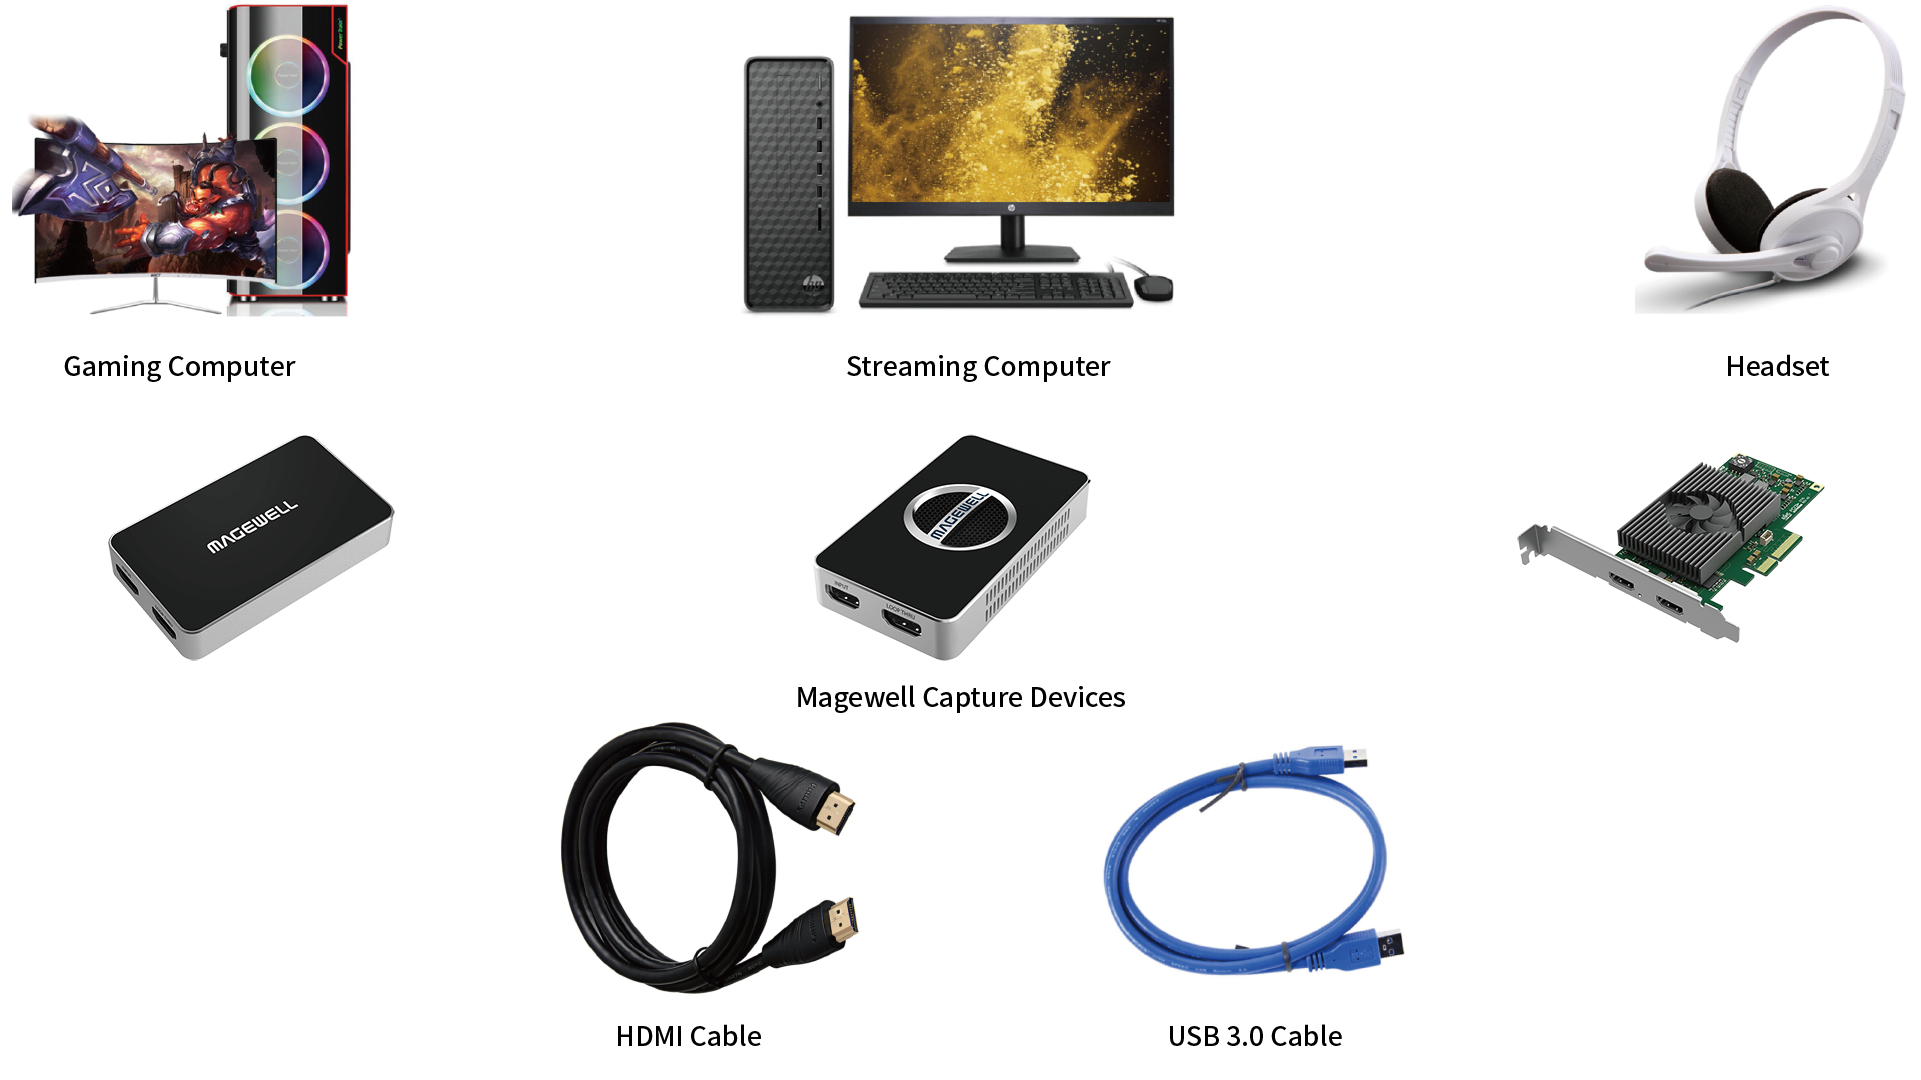
Devices Used:
- A gaming computer (desktop or laptop) with audio management software installed. For this example, we are using the VoiceMeeter Banana software for VB-Audio.
- A computer (desktop or laptop) with streaming software installed. For this example, we use our free Capture Express V3.2 software.
- A gaming headset.
- A Magewell PCIe capture card or USB capture device. Pro Capture HDMI 4K Plus LT, USB Capture HDMI Plus or USB Capture HDMI 4K Plus are recommended for single-channel signal capture with loop-through.
- A Magewell USB 3.0 cable (if using a USB Capture device) and two HDMI cables.
Steps:
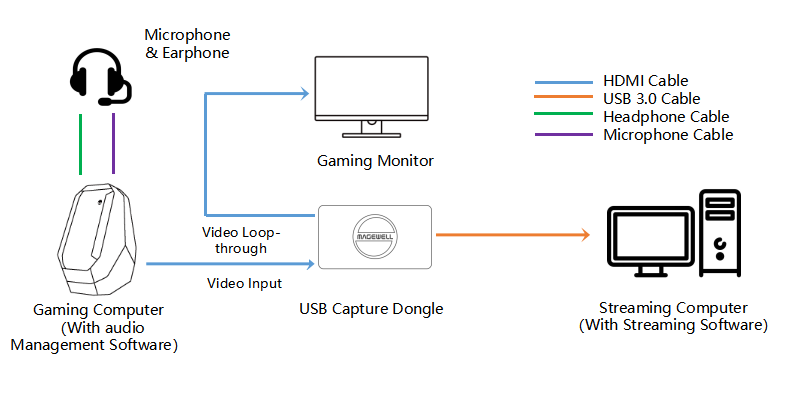
1. Device Connection
The following diagrams show how to connect a Magewell USB or PCI Express capture device to capture and loop-through game video and audio.

2. Audio Configuration
By default, you may only be able to select one output audio device in the gaming computer. If you select the speakers or headset connected to the gaming computer’s sound card, the player will be able to hear the gaming audio, but the capture device will not be able to capture the sound. If you select the Magewell capture device for audio output, the gaming computer system sound will be sent to the capture device, but the local speakers or headset will not play it. As a result, either the user or the audience will be unable to hear the game audio, which greatly reduces the playing experience or viewing experience.
Audio management software such as the VoiceMeeter Banana advanced virtual audio mixer can solve this problem.
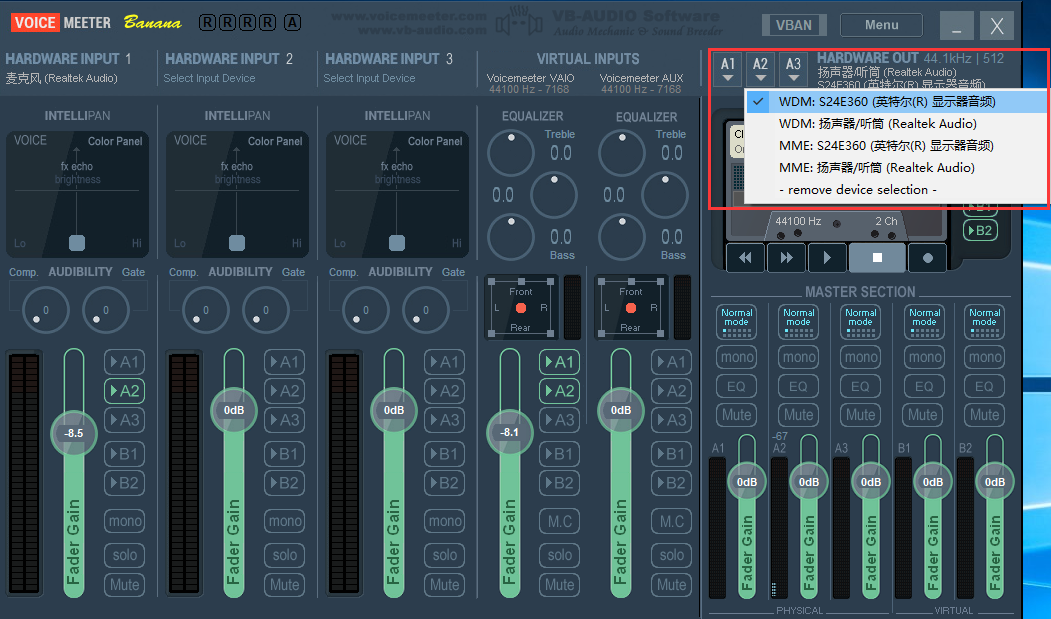
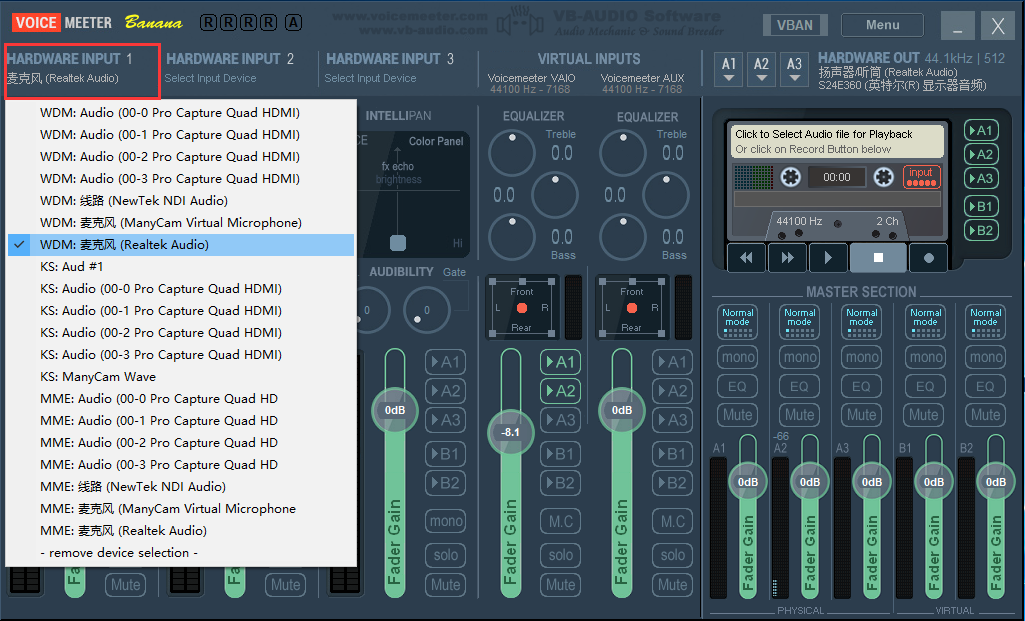
In the VoiceMeeter Banana software, click the A1 button and select the streaming computer’s speaker or headset as the audio output device in the drop-down list. Next, click the A2 button and select the HDMI monitor connected to the loop-through of the Magewell capture device. (The monitor will be listed by its model number; in this example, it is shown as the S24E360).
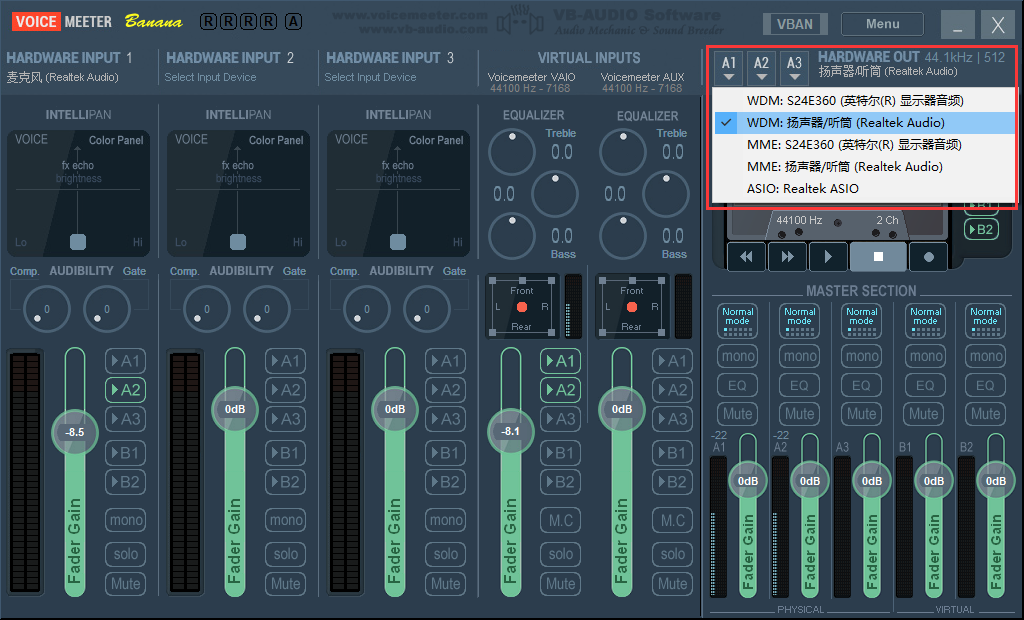
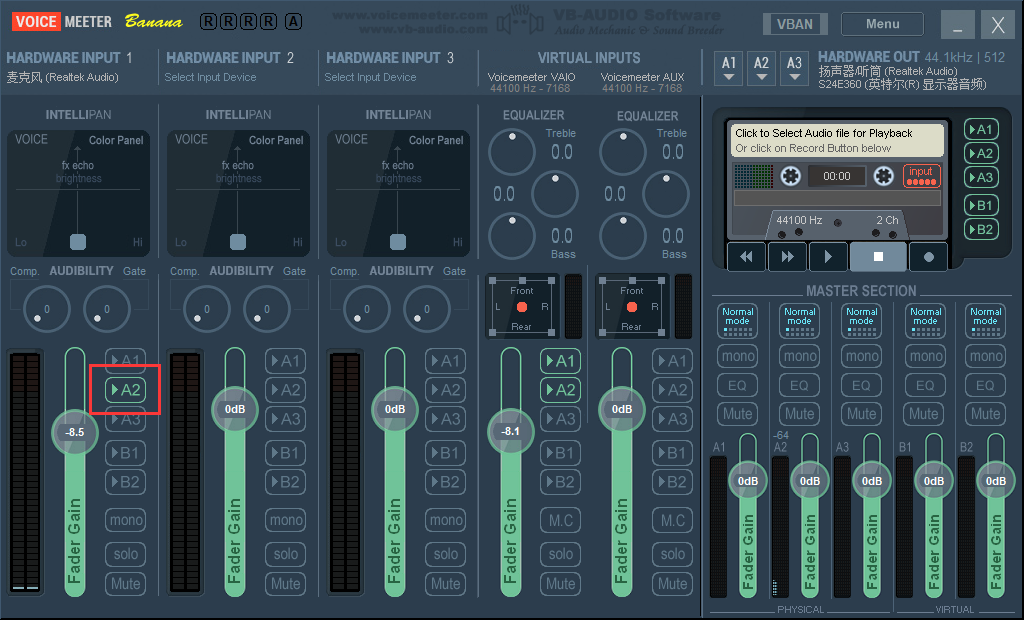
Click the "HARDWARE INPUT 1" tab, and select your microphone device in the drop-down list. Next, activate the A2 button in the microphone’s mixer to also route its audio to the capture device and monitor.
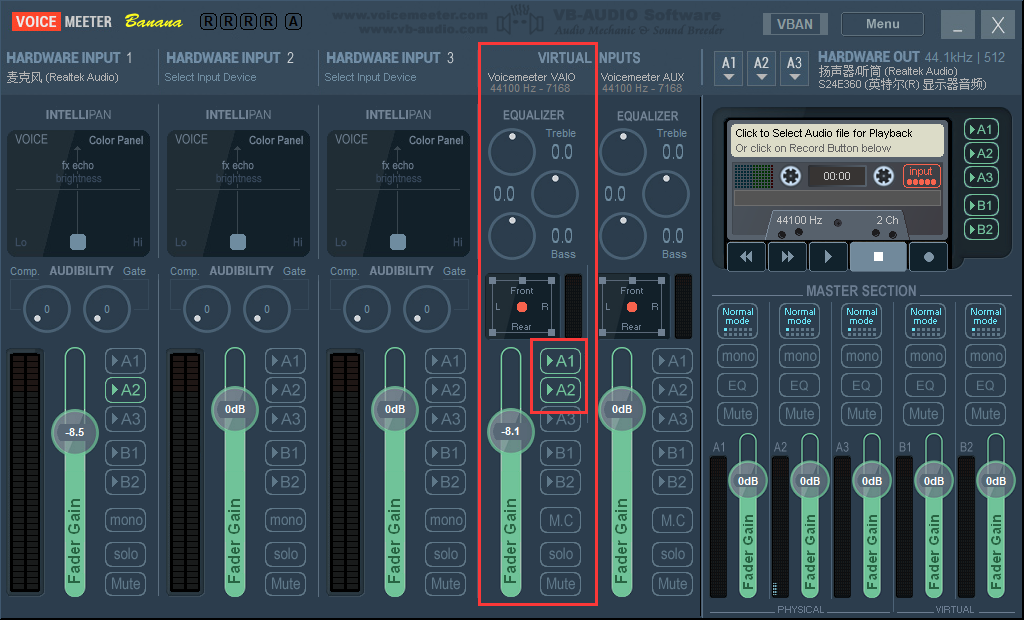
Next, light up the "A1" and "A2" buttons under the "VoiceMeeter VAIO" label.
Finally, select VoiceMeeter Input as the playback device on the gaming computer.
Using the above settings, VoiceMeeter Banana will output the system sound of the gaming computer to A1, which is the gaming computer’s speaker or headset. Meanwhile, the gaming computer’s microphone and system sound will be mixed and output to A2, which is the Magewell video capture device (installed on the streaming computer). In this way, both the gamer and streaming computer can “hear” the audio.
3. Open your streaming software. Choose the Magewell capture device as the input source, and start streaming the game.