NDI Router Tutorial: A Practical Guide to Easily Manage NDI Network Video Signal Routing
I. Introduction
In July 2025, NDI® released the Advanced SDK Version 6.2, and the integrated NDI Router has brought revolutionary changes to video signal management. With this feature, users no longer need to rely on traditional hardware routing systems. Instead, they can configure signal routing with a virtual switcher to efficiently manage their NDI video sources. Users of Magewell Pro Convert decoders can unlock this functionality by upgrading their device firmware to V1.2.213. In this article, we will share the step-by-step guide to utilizing this new feature.
II. Preparation of Equipment and Environment
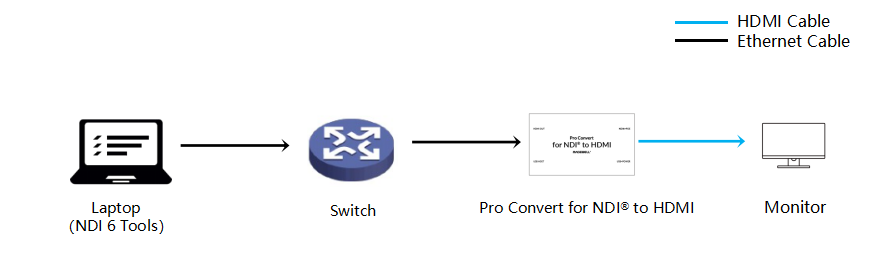
You will need the following equipment:
- PC with NDI 6 Tools Installed: This article references a Windows-based computer as an example, but NDI 6 Tools are also compatible with macOS.
- Magewell Pro Convert Series Decoder: This article uses the Pro Convert for NDI to HDMI as an example. (hereinafter referred to as "decoder")
- Ethernet Switch and Monitor: For setting up the test network environment.
- Ethernet and HDMI Cables: For connecting devices.
III. Detailed Steps
(i) Software Interface Operation
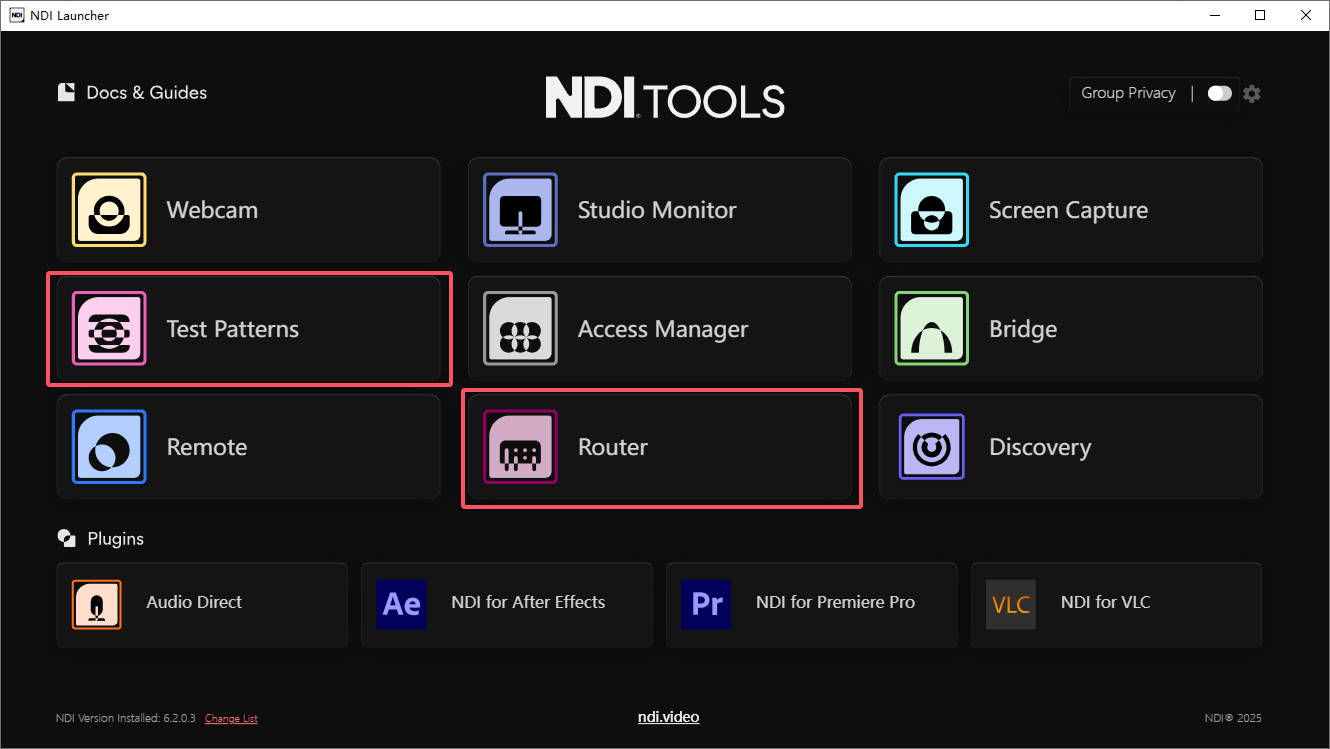
- Open NDI 6 Tools: In the NDI 6 Tools software interface, open the "Test Patterns" tool (as the NDI sender) and the "Router" tool in sequence. This is the starting point for building your signal transmission chain. The "Test Patterns" tool generates test signals, which facilitates the observation and verification of signal transmission effects later on.
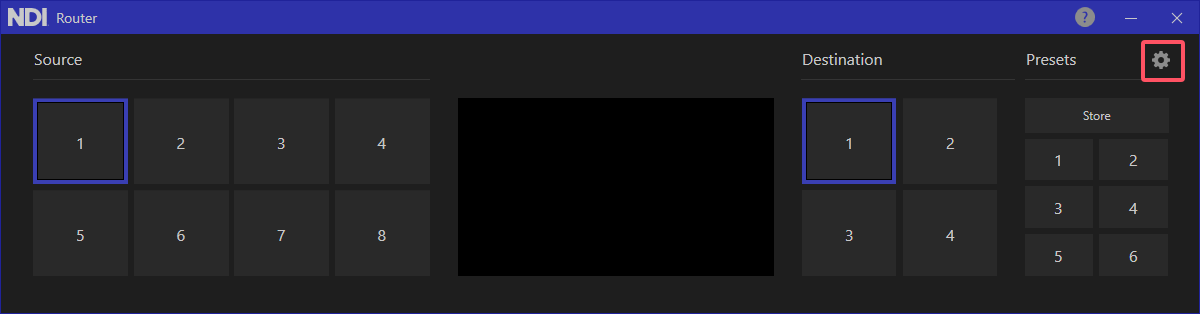
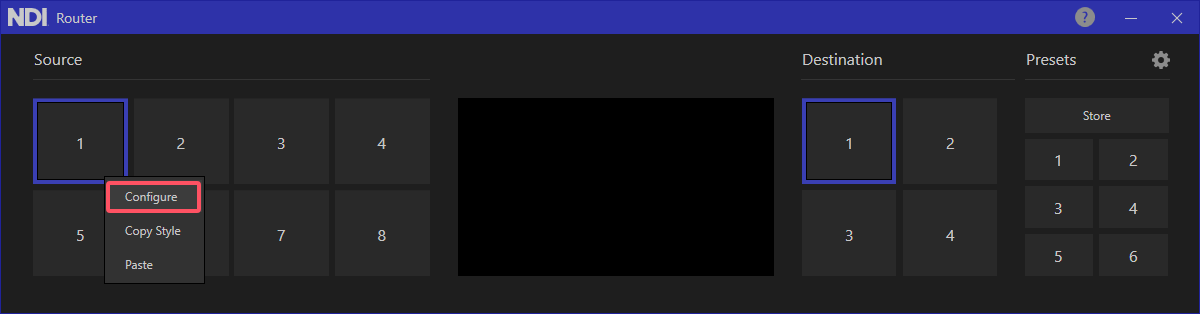
- Configure the Router: NDI Router can manage up to 64 sources and 64 destinations. To configure it, click on the gear icon in the upper right corner of the application to activate configuration mode.
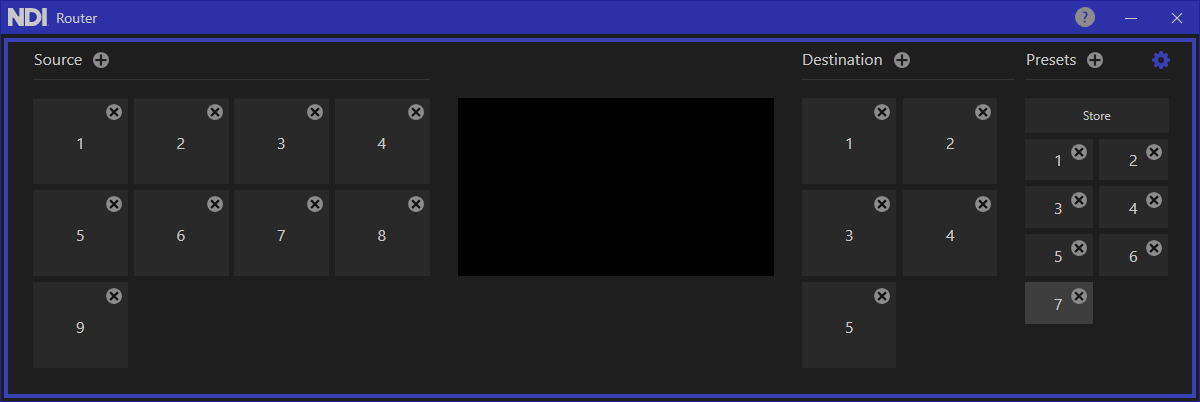
Once configuration mode is activated, you can flexibly add or remove signal sources, destinations, and presets by clicking the "+" icon to the right of each label and the "X" icon at the top right of the numbers, to accommodate different scenarios.
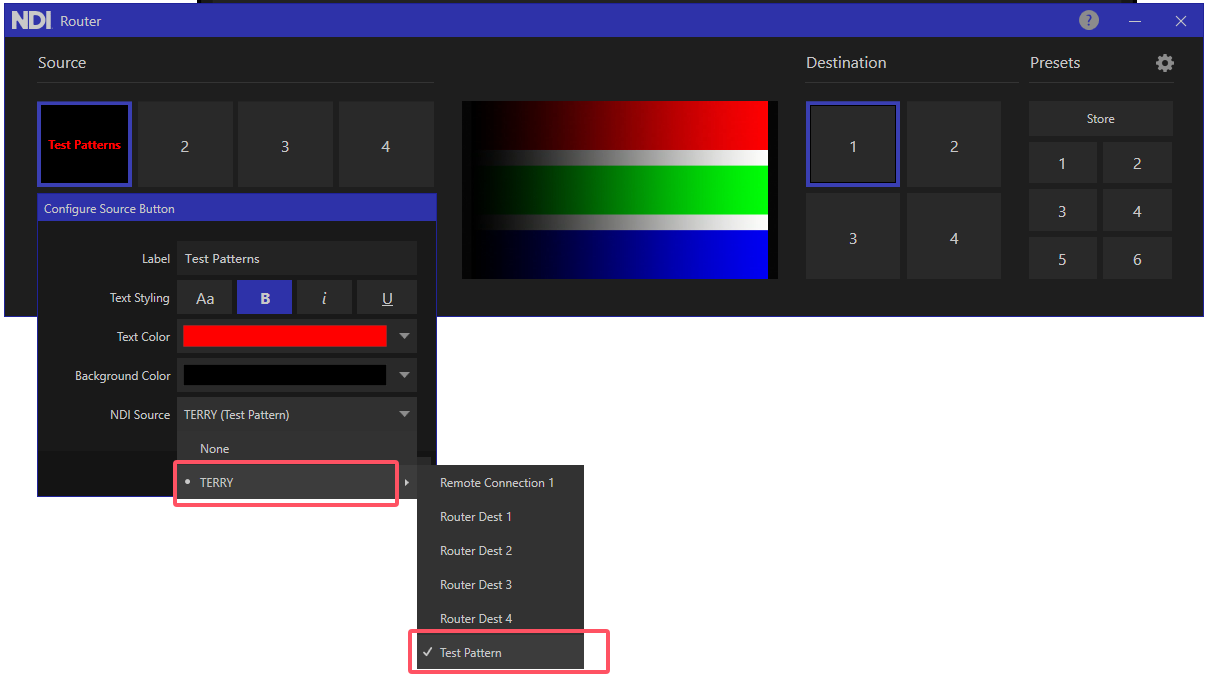
- Set up the signal source: Hover the mouse over the "1" signal source icon under "Source", then right-click and select "Configure". In the configuration interface that appears, complete the settings for the signal source (name, font, font size, etc.) and then, in the "NDI Source" drop-down, select the NDI video stream sent from "Test Patterns".
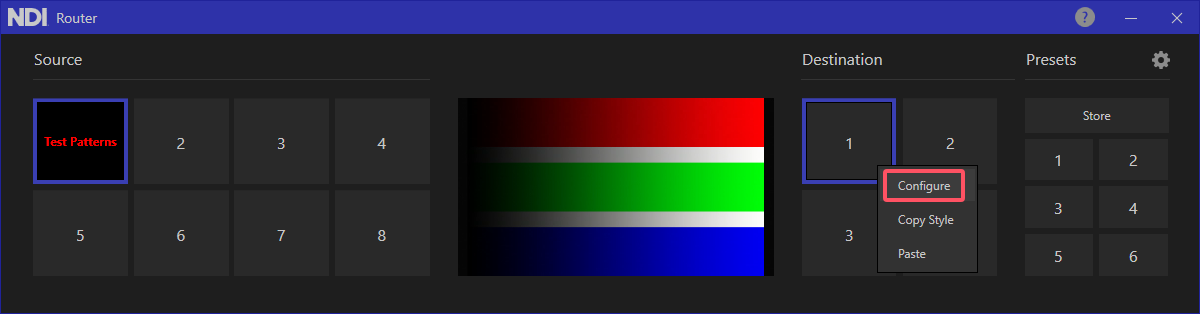
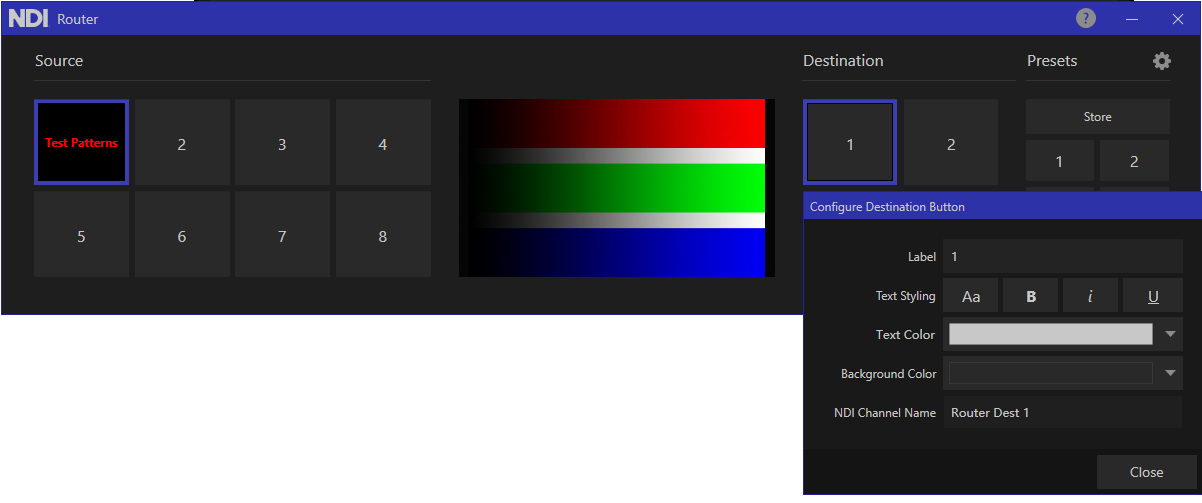
- Set up the virtual output: Hover the mouse over the "1" and "2" signal source icons under "Destination", right-click and select "Configure" and again set the virtual output name, font size, and NDI virtual output channel name according to your needs. Next, click the "1" icon under "Destination" first, and then click the "Test Patterns" to route the created "1" NDI virtual route output (i.e., "Router Dest 1"). The same operation can also route the NDI signal to any output.
(ii) Decoder Operation
- Log in to the Web UI: Log in to the Web UI of the Magewell Pro Convert decoder, and click on "Source" → "NDI SOURCES" in the menu bar. At this point, you can see the virtual output channels that you created in the NDI Router, such as "Router Dest 1" and "Router Dest 2".
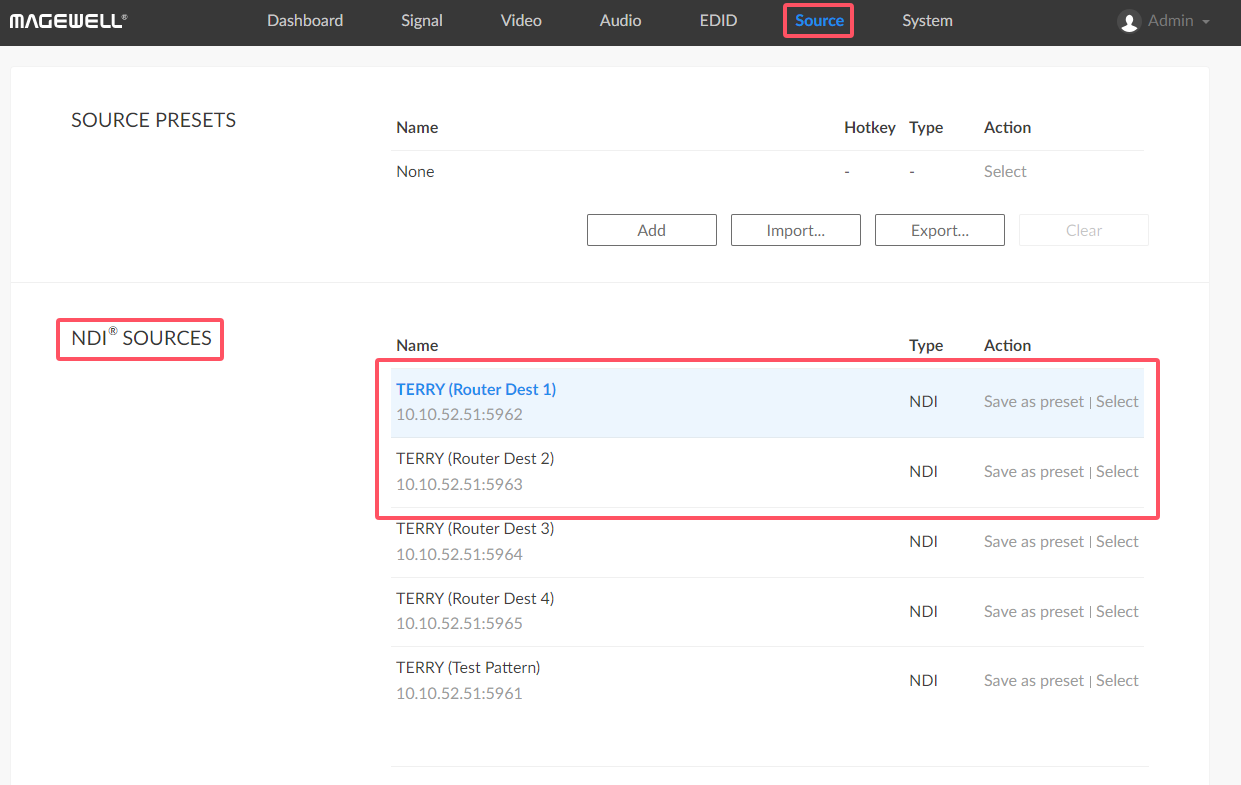
- Select the signal source: Click to select "Router Dest 1" or "Router Dest 2" to decode the NDI signal output from Test Patterns and convert it to an HDMI signal output to the monitor. In this way, you can clearly view the signal coming out of NDI Router and verify its integrity.
IV. Summary
With the above steps, you have successfully used the Magewell Pro Convert decoder and NDI Router to build an efficient and flexible NDI video signal management and transmission system. This combination simplifies the management of multiple NDI video sources, providing strong technical support for various professional video production scenarios.
Other Blog tutorials:
• Pro Convert Decoders Firmware Update: Enhancing NDI Discovery for Optimized Network Workflow.
Click here to learn more.
NDI® is a registered trademark of Vizrt NDI AB.