Controlling Director Mini Remotely over the Internet with Control Hub
Director Mini provides flexible options for remotely controlling the all-in-one production and streaming system both on-site and over the internet. For remote control of Director Mini over the internet, users can register their device with the optional Control Hub centralized management software. This article introduces how to control Director Mini via Control Hub.
Devices:
- The Control Hub software, already installed on your own server or cloud hosting platform and accessible over the internet via a static, public IP address
- One Magewell Director Mini device
- A laptop, a mobile device (such as a smartphone or a tablet), and a USB cable
Steps:
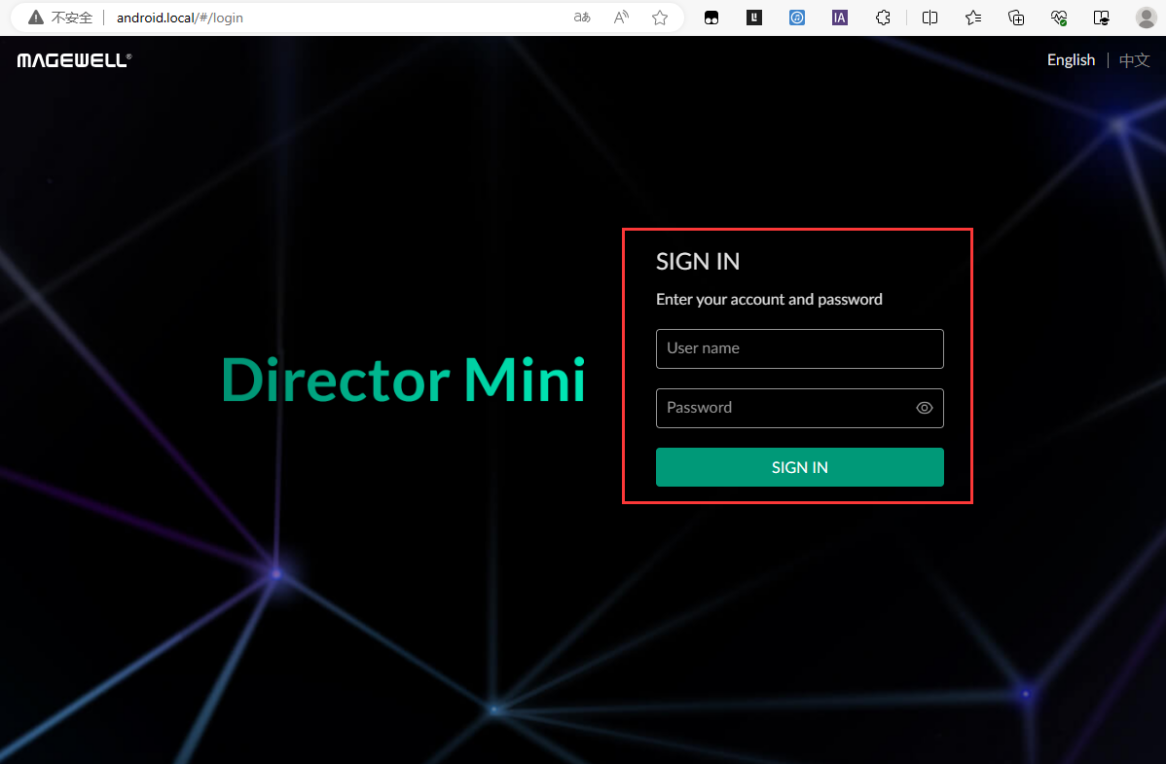
1. Connect the USB-C port of the Director Mini unit to the laptop computer using a USB cable. Open a web browser, and enter the URL http://android.local/. Log into the Director Mini web GUI using your username and password.
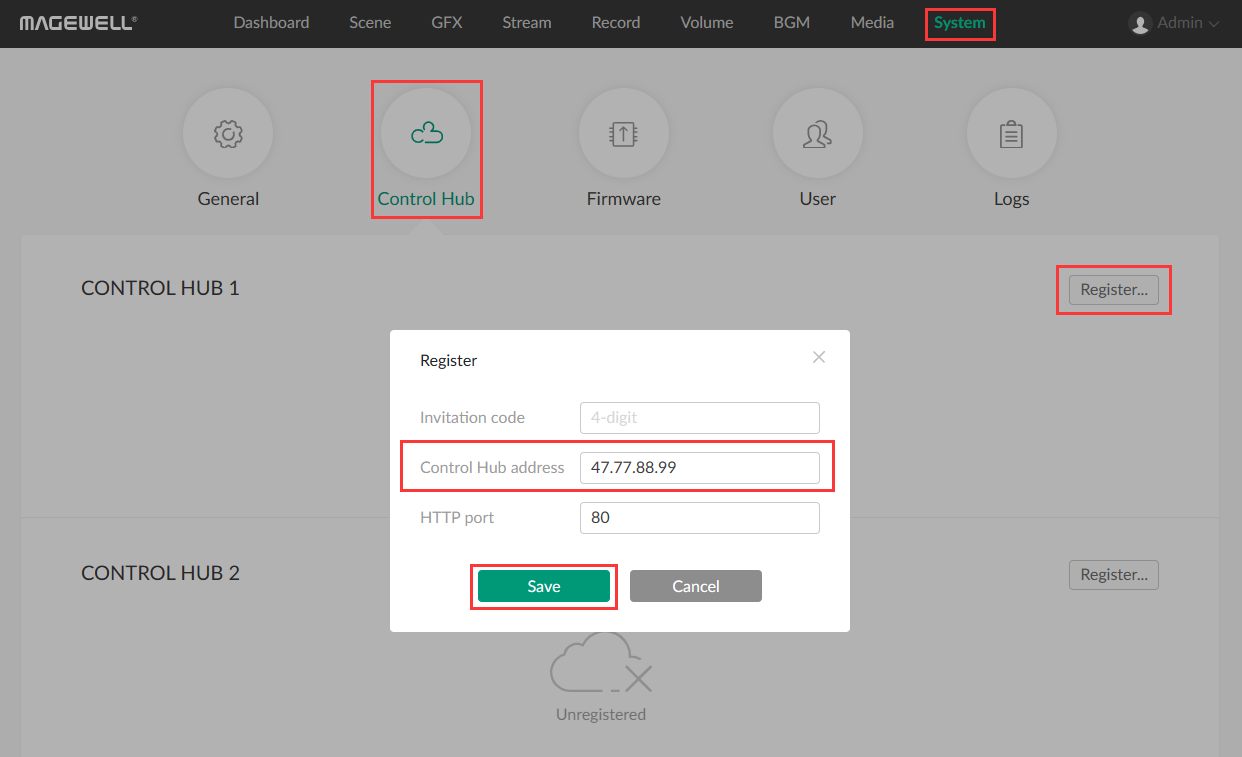
2. Select "Control Hub" in the "System" tab, then click "Register". In the pop-up panel, fill in "Control Hub address" with the public IP address of your Control Hub installation. (The invitation code does not need to be filled in). Click "Save".
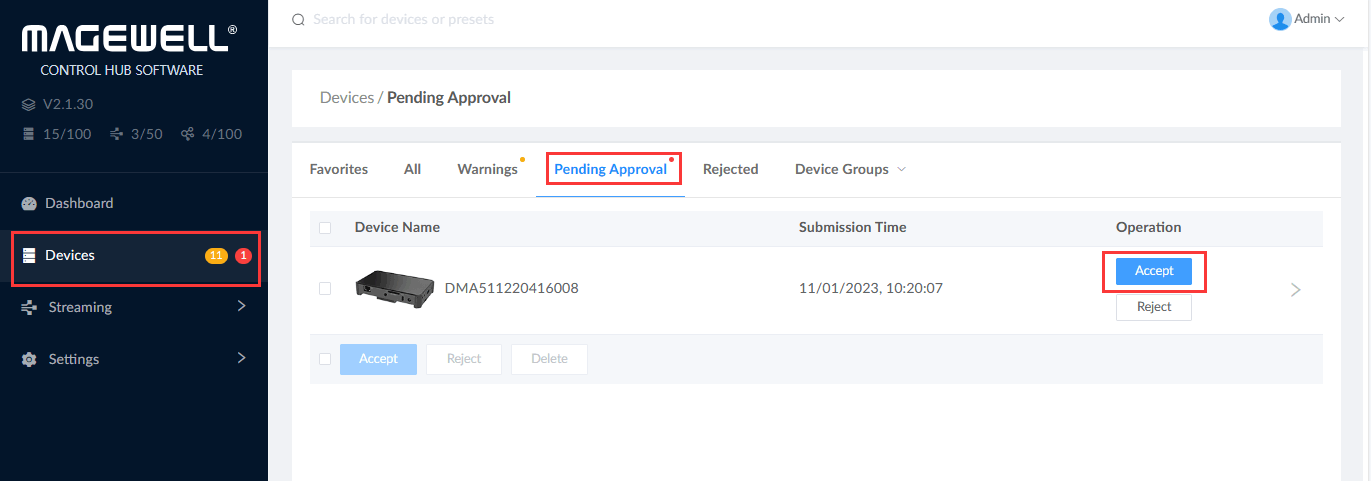
3. Access your Control Hub deployment via your phone, tablet, or computer. Go to “Devices” in the left navigation, and select the “Pending Approval” tab. Select your Director Mini device, then click "Accept". Your Director Mini is now successfully registered to your Control Hub.
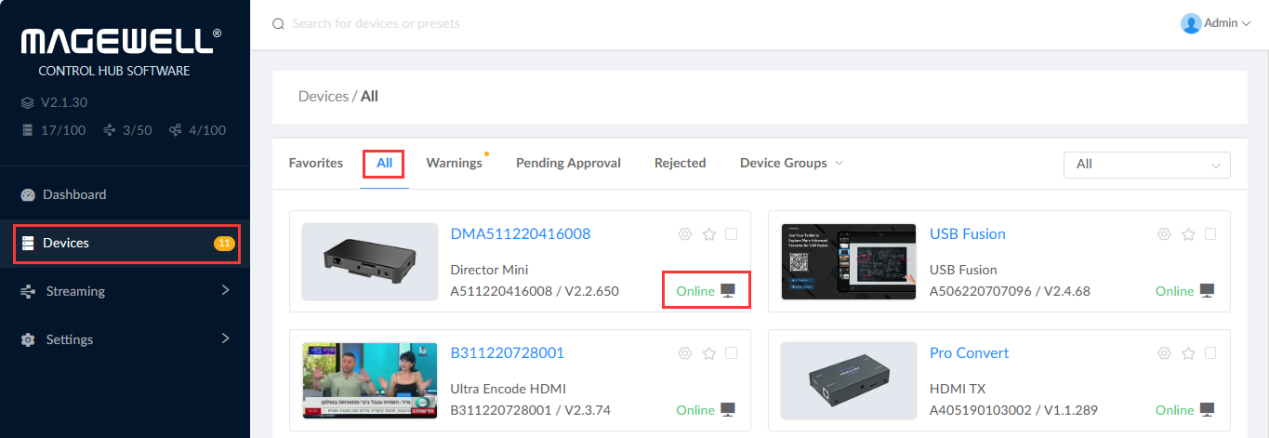
4. Click the "All" tab in the Devices window. Select the Director Mini unit that you just registered, and click the "Online" icon in the lower right corner to remotely access the device's Web GUI.
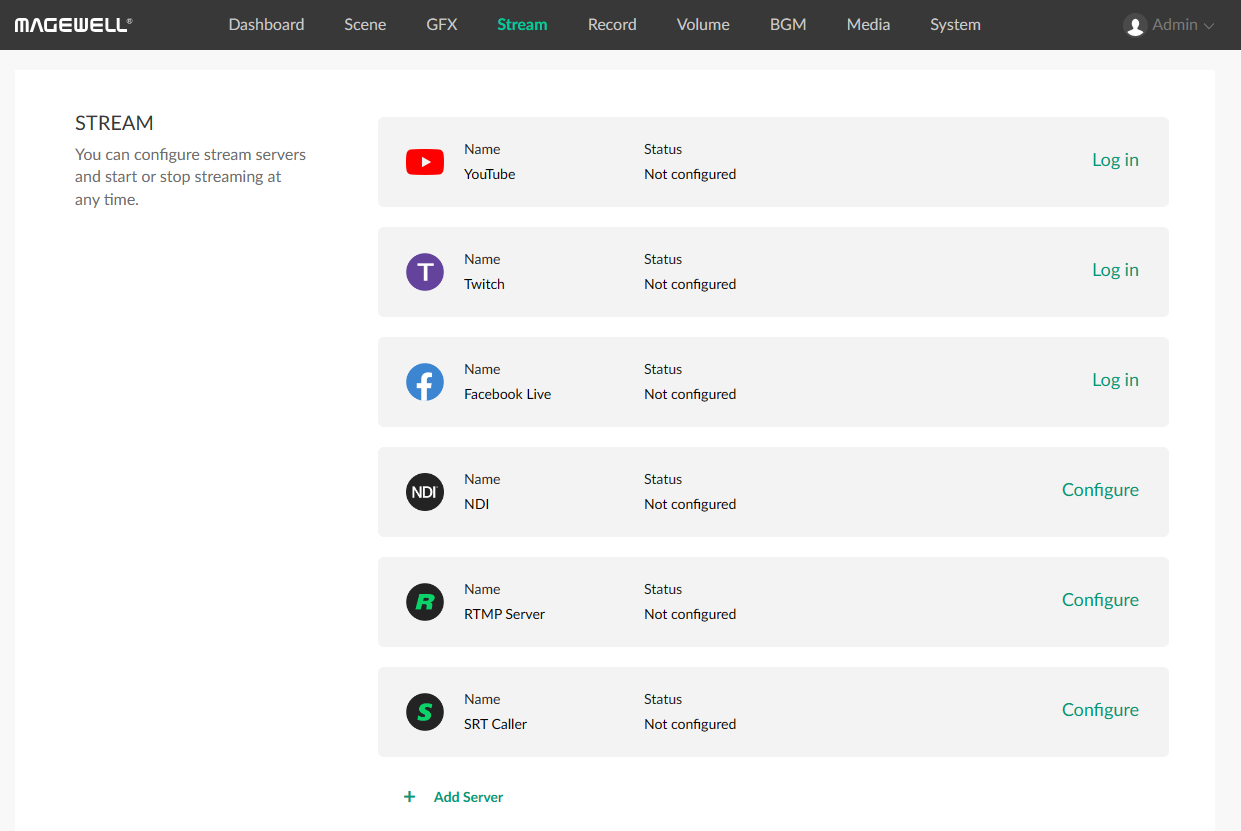
5. Through the Web GUI, you can monitor Director Mini’s device status, switch scenes, add graphics, perform streaming and recording, adjust audio volume, manage media files and more.