Knowledge Base
 All
Content
All
Content
How to set the IP address for Pro Convert
Article ID: 005020010
Pro Convert Family


In a DHCP-enabled LAN, the Pro Convert device is plug-and-play
Connect the converter to Ethernet network and power it up, then the unit will be assigned an IP address automatically, and the device is ready to work.
To have great control on the device, like changing encoding/decoding parameters, you need to use the Web UI. Do the following steps to open the Web UI.
- For Linux and MacOS users, refer to the non-DHCP network operations below to get access to the Web UI and log in, then you can configure the device and monitor device status.
-
For Windows user, do the following steps to open the Web UI:
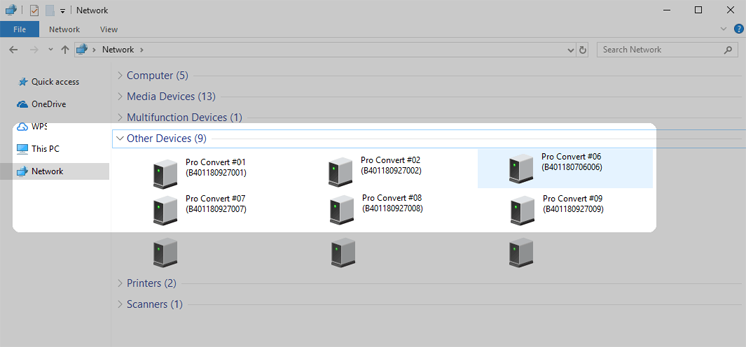
- Open a File Explorer window.
- Select the Network, and turn on the network discovery function if a prompt window appears.
- Find your Pro Convert device in the Other Device section, where the detected device will be shown as "Pro Convert + #board index + (serial number)".
- Double click the converter icon to open the Web UI in your web browser.
- After logging in successfully, you can do the configurations and monitor device status.
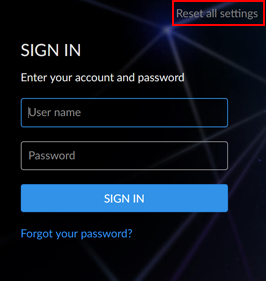
If you forgot the password, click Reset all settings at the top-right corner of the SIGN IN page to set all parameters back to the default values, then you can log in with the default administrator account (case-sensitive):
- Username: Admin
- Password: Admin
In a non-DHCP LAN, you will have to set IP address manually in the Web UI
-
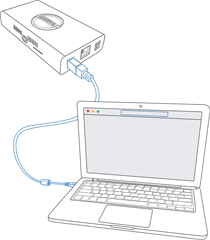
Get access to the Web UI via USB RNDIS
a. Connect your computer and your device.
b. Type http://192.168.66.1 in your web browser to log in.
If you can’t see the SIGN IN page, do the following steps to find the RDNIS IP address.
- Linux
- Launch the terminal.
- Type in "
ifconfig -a", and find an IPv4 address of the form 192.168.xxx.2.
- MacOS
- Launch the System Preferences.
- Choose Network > Pro Convert, and check its IP Address.
- Windows
- Type "
cmd" in the search bar to start the command interpreter. - Type in "
ipconfig", and find an IPv4 address of the form 192.168.xxx.2.
- Type "
If 192.168.xxx.2 is taken, the IP address would automatically change to another value within the ranges of 192.168.xxx.2 to 192.168.xxx.254.
- Linux
-
Login
Sign in using the default administrator account (case-sensitive).
- Username: Admin
- Password: Admin
If you forgot the password, click Reset all settings at the top-right corner of the SIGN IN page to set all parameters back to the default values, then you can log in with the default administrator account.
The reset option is only available when connecting the convert directly to the PC via USB RNDIS.
-
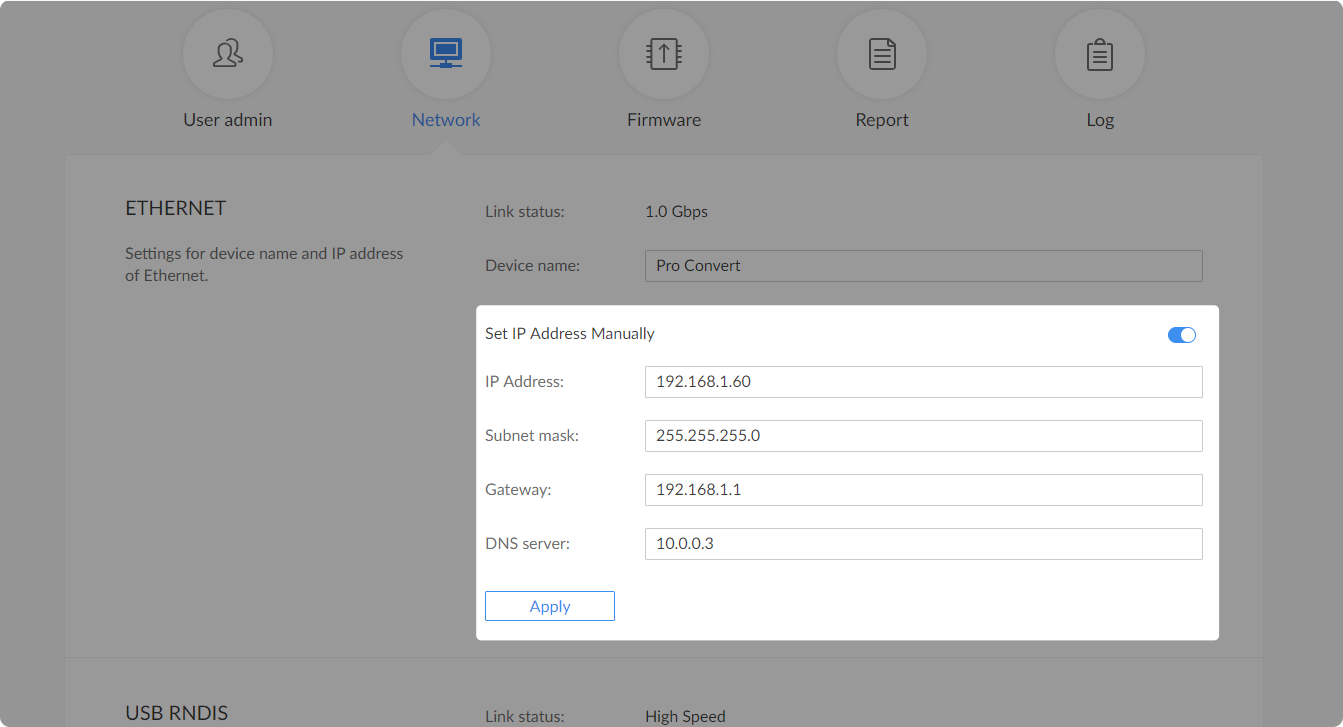
Set IP address manually
a. After logging in with an admin account, go to System > Network.
b. Turn on Set IP Address Manually, and then enter a new IP address, Subnet mask, Gateway, and DNS server. The IP address must be within the same network segment with your PC.
c. Click Apply to save changes.
Reference
For the latest Pro Convert products, please visit our official website: https://www.magewell.com/pro-convert.
For the list of NDI-enabled software, please refer to http://www.magewell.com/compatible-software.
Has your problem been solved?