-
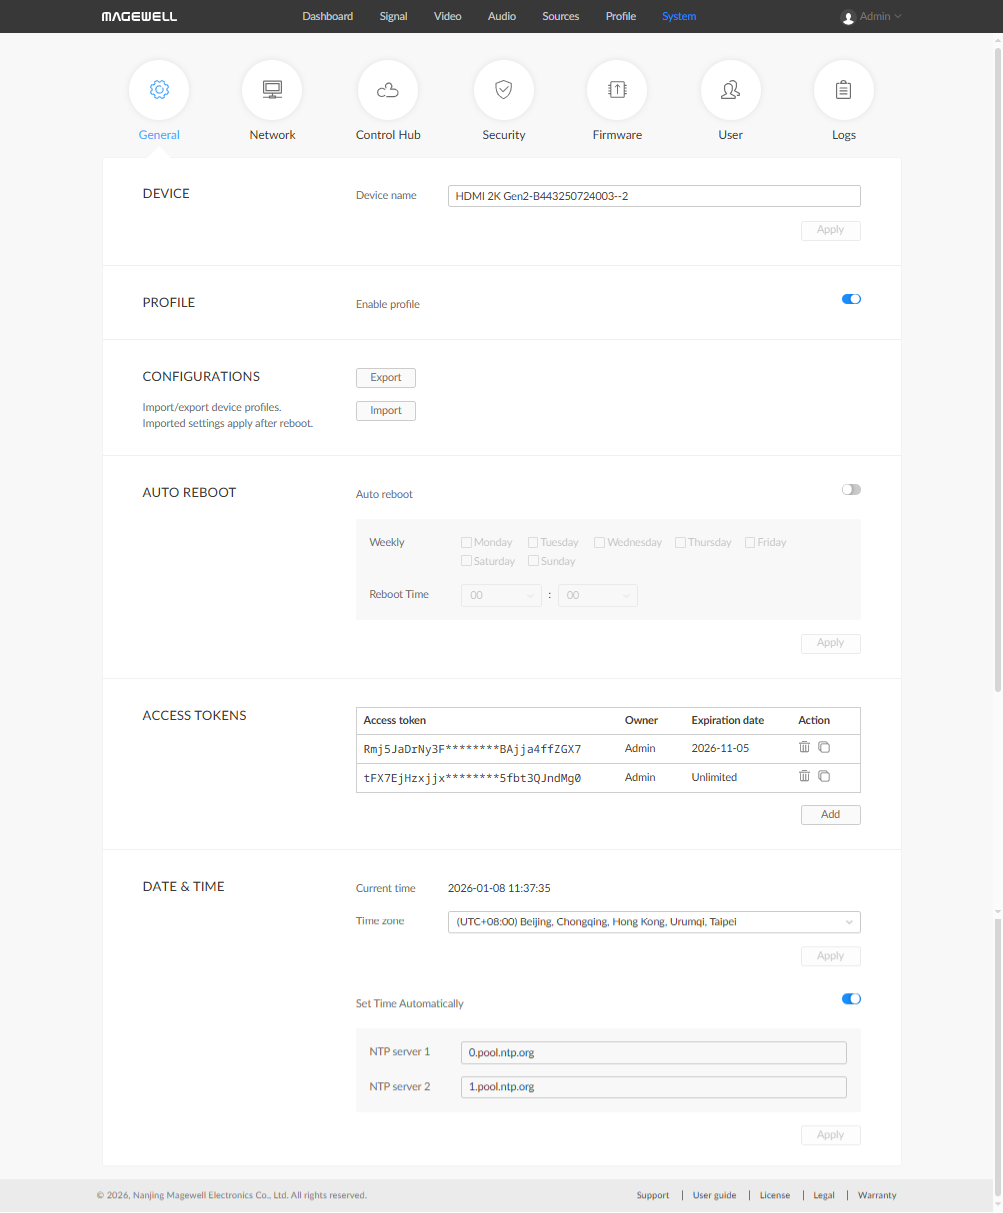
Device Name
When used only as a device name, the value range is 1-32 characters, including A-Z, a-z, 0-9, space . _ -+ ' [ ] (), and the first and last characters cannot be spaces.
When used as a domain name for WebUI access, it needs to follow the Internet host naming standard RFC 1123. It is recommended to only include: lowercase letters a-z, numbers 0-9, hyphen -. Spaces and underscores will be automatically replaced with hyphens.
After you specify the device name, an mDNS domain name is generated automatically. Click it to access the Web UI directly, for example, 'IP-to-AIO-4K-B440260200000-450.local'.
-
USB Device
Supports uppercase and lowercase letters, numbers, spaces, and _-®. The default is the device model, such as Pro Convert IP to AIO 4K. Can be used to select the source during UVC capture. After modification, the device needs to be restarted to take effect.
Note: On Windows OS, you need to remove the device from the Device Manager, restart the device, and re插拔 UVC to display the latest device name.
-
Profile
Enable Profile to display the Profile tab in the navigation bar. Users can configure multi-view output modes such as Picture-in-Picture and Quad Split.
For detailed configuration, refer to Configure Multi-view Output.
-
Front Panel
The ‘Lock menu knob’ is disabled by default. When enabled, the OSD menu cannot be called by the menu knob.
-
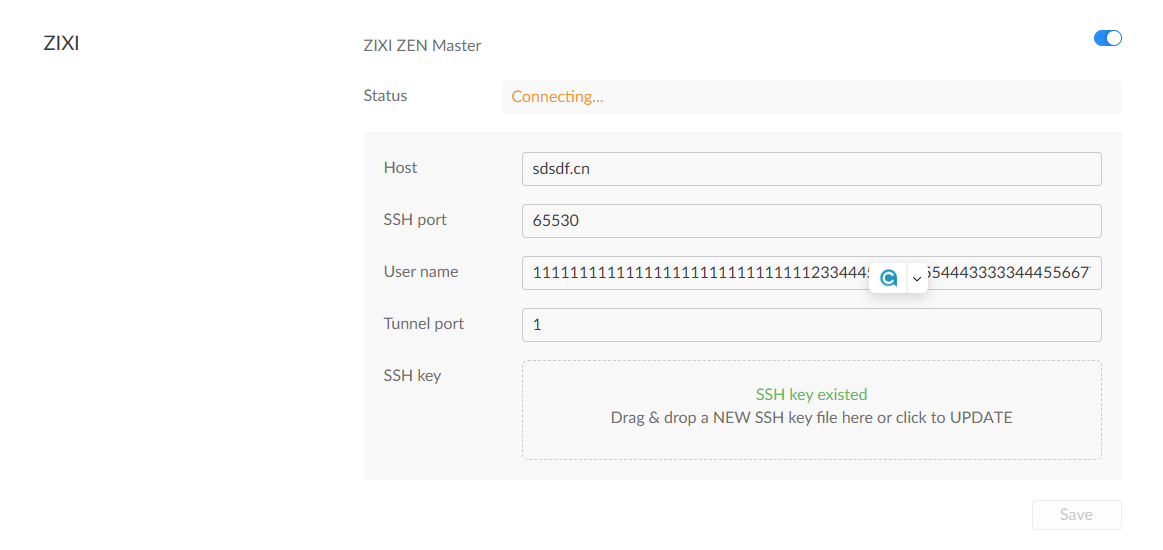
ZIXI ZEN Master
The 4K device supports remote management through ZIXI ZEN Master. Before configuration, you need to obtain ZIXI ZEN Master parameters and connection details.
- Ensure you have a ZIXI ZEN Master account.
- You have received the ZIXI connection details from your service provider, and add a remote access session for your decoder in ZIXI ZEN Master.
- Obtain the ZIXI ZEN Master parameters including: host address, Username, Password, SSH key, and tunnel port.
- The decoder has an active network connection to the Ethernet.
![]()
-
Toggle on the ZIXI ZEN Master switch.
-
Set the ZIXI ZEN Master parameters with the following values:
- Host: Enter the ZIXI ZEN Master server address. In this case, use partnerdemo.io.zixi.com
- SSH port: Default value is 22. Change this only if instructed.
- User name: Enter the assigned username for this decoder. In this case, use decode_HDMl4K-Ino5m.
- Tunnel port: Enter the tunnel port assigned to this device. In this case, use 27719.
- SSH key: Load the SSH key (downloaded from ZIXI ZEN Master) into the decoder.
-
Click Save at the bottom of the ZIXI section to apply all settings.
-
After saving, check the Status field under ZIXI ZEN Master.
Note: The status may initially show "Disabled" and will update to "Connecting" once the configuration is applied, and "Connected" indicates a successful connection to the ZIXI ZEN Master server is established.
"Failed" indicates the decoder can not communicate with the server, you need to check the configuration of the decoder and the Remote Access of the ZEN Master to troubleshooting.
-
Verification: After completing the above steps, confirm that the decoder's status on ZIXI ZEN Master matches the example shown below. This indicates a successful connection to the ZIXI ZEN Master server. You can now remotely control the decoder by clicking the link to open its web UI.
Note: Switch to image preview in Dashboard tab after logging is recommended, since low latency video preview is not accessible via Zen Master.
-
Configurations
- Export: Export the current device configuration as a bin file.
- Import: Import a previously exported configuration file.
-
Reboot
Click Reboot the device to restart the device immediately.
This feature is disabled by default. Enable Auto Reboot, select reboot days, and set the reboot time.
Click OK to save the configuration.
-
Access Tokens
Tokens allow API access without logging in to the Web UI.
- Click Add to create a new token, specify a token name of 1-31 characters (A-Z, a-z, and 0-9), and click Apply. Then the device generates the token automatically.
- Click Apply to save the configuration.
-
Click the delete
 or
copy
or
copy icon to manage existing tokens.
-
Date and Time
- Time Zone: Set the local time zone.
- Auto Set Time: Synchronize time automatically via NTP.
- NTP Server 1: Default is 0.pool.ntp.org.
- NTP Server 2: Default is 1.pool.ntp.org.
- Click Save to apply the settings.