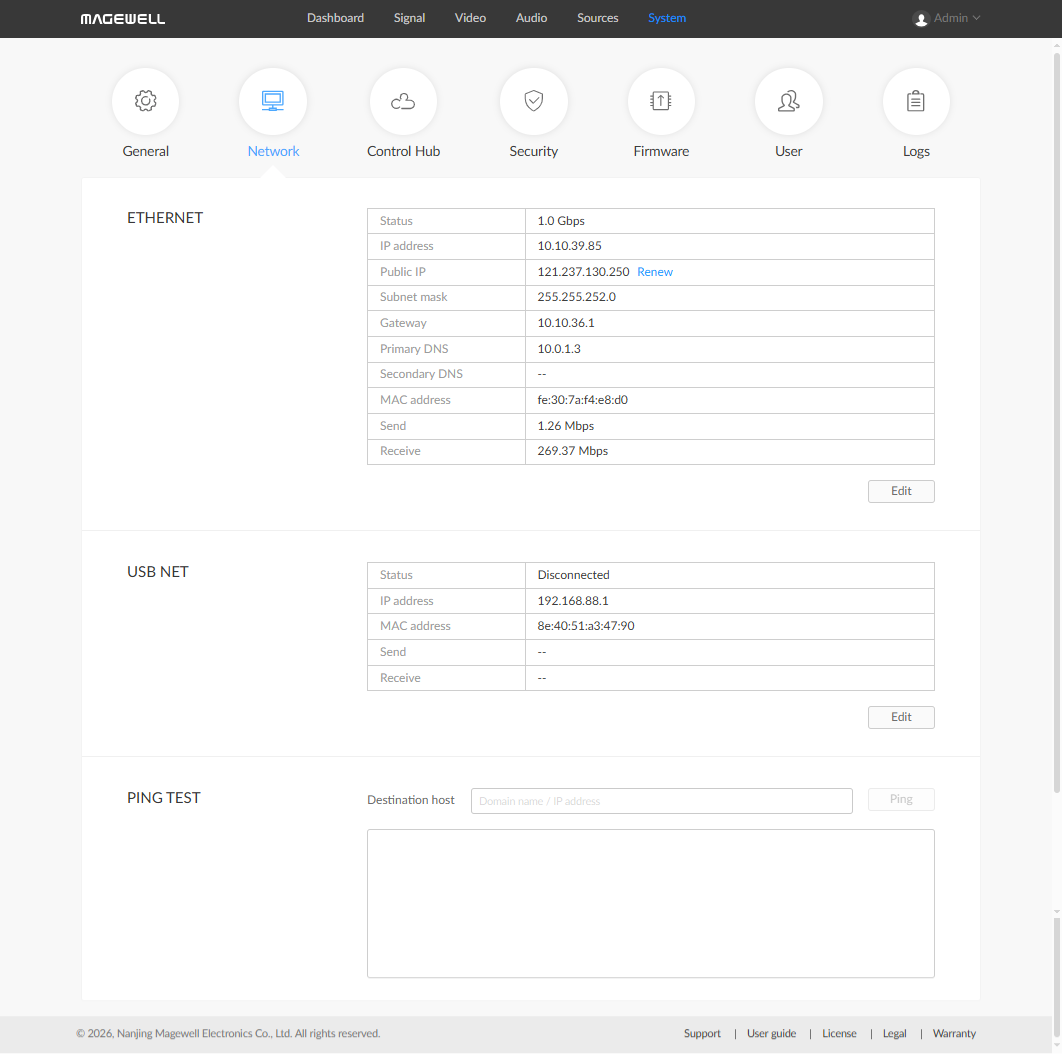
- From the navigation bar, go to System > Network.
- (Optional) Get Public IP: supports retrieving the device’s public egress IP address via manual click. Triggered manually only; the device does not proactively access the public network. Each click performs a one-time retrieval, with no subsequent automatic updates.
- Configure the Ethernet IP address.
- Click Edit, enable Manual IP Address Setting, and enter IP Address, Subnet Mask, Gateway, and DNS Server.
- Click Apply to save the settings.
- Verification: Enter the configured IP address in a web browser and confirm that the Web UI can be opened.
- Set the USB NET IP address.
- If there is no conflict on the LAN, it is recommended not to change the USB NET IP address.
- It is recommended not to connect multiple decoders to the same computer via USB NET at the same time.
- Click Edit and enter the IP Address.
- Click Apply to save the settings.
- Verification: Enter the configured IP address in a web browser and confirm that the Web UI can be opened.
- Network Test
The device provides a quick network test tool. Enter the destination host domain name or IP address, click Ping, and use the result to determine network status.